The manual shutdown procedure can be a useful tool for solving errors and glitches that you’re experiencing with your solar PV power system. Follow the guide below to power down your system (and switch it back on again).
SOLAR ONLY
If you’re unsure about of any of the steps, or your solar power system looks notably different from the pictures below, call 1300 73 93 55.
Step 1
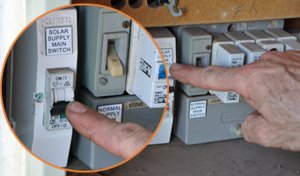
Go to your switchboard and open it. Locate the solar supply main switch and flick the switch to the off position.
Step 2
If your solar power inverter is more than 3 metres away from your switchboard, you must locate the switch marked, solar AC isolator. This will be located next to your inverter. If your inverter and switchboard are within 3 metres of each other, disregard this step.
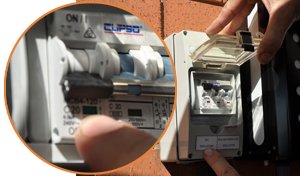
Step 3
Go to your inverter and find the switch marked PV Array and DC Isolator. Flick this switch to the off position (in some cases there will be two switches).
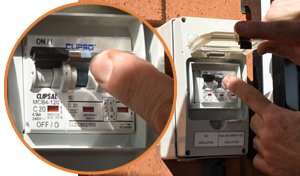
Step 4
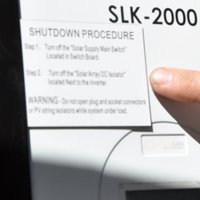
Your inverter may have a switch marked Inverter Isolator. If it does, flick this switch to the off position. If you cannot locate this switch on your inverter, skip this step.
Your solar PV system should now be completely switched off. All lights and screen displays will be dead. Keep the system off for a minimum of five minutes.
Step 5
To re-start your system, follow this guide in reverse order. ie. DC isolator on first, followed by AC isolator, followed by your solar supply main switch.
If you are still experiencing issues, our experienced technicians can help you.
SOLAR AND BATTERY
If you have a battery please follow the instructions above and then follow the shutdown instructions on your battery.
