Read on for a guide on how to reconnect your Goodwe inverter to WiFi so that you can take full advantage of your solar energy system and its monitoring platform.
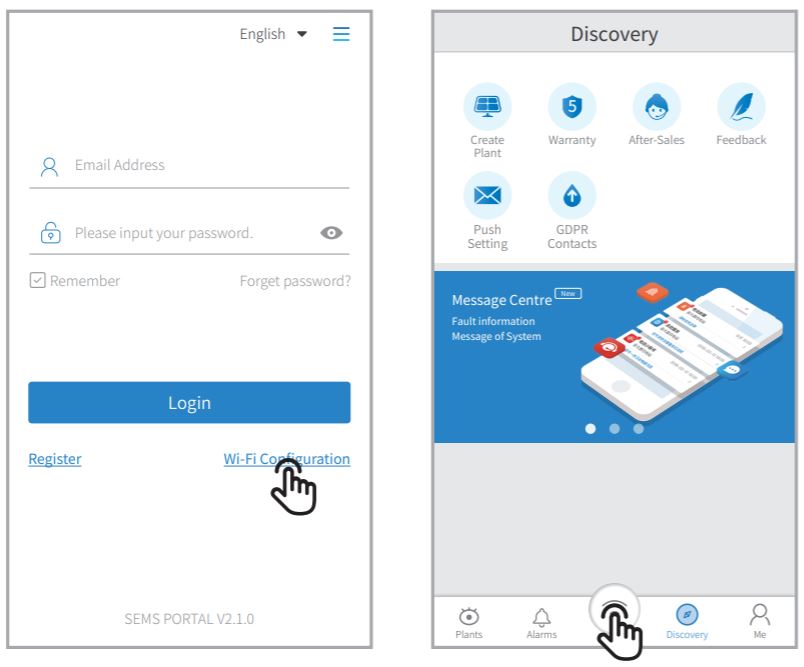
Step 1
Download and install the latest SEMS portal app. Ensure your inverter (or EzLogger Pro (WiFi version)) are turned on, as well as your modem.
Step 2
Open the app and click "WiFi configuration on the login page, or click the WiFi icon on the homepage.
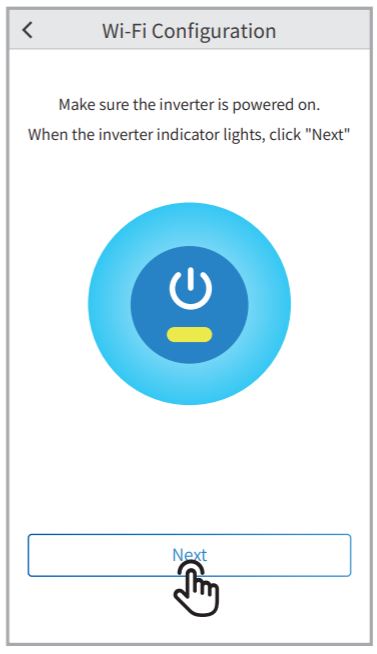
Step 3
Make sure inverter is turned on, then click "Next".
Step 4
Select "Go into WLAN setting interface".
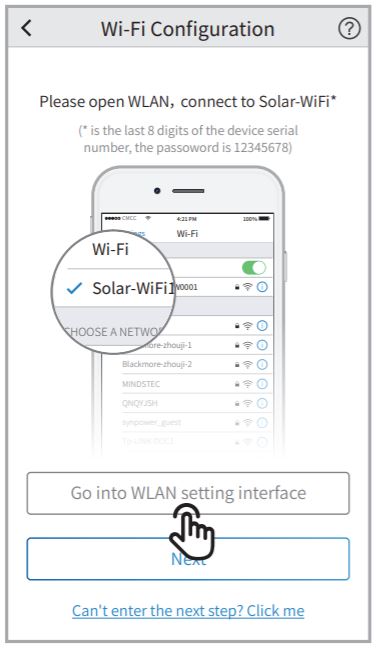
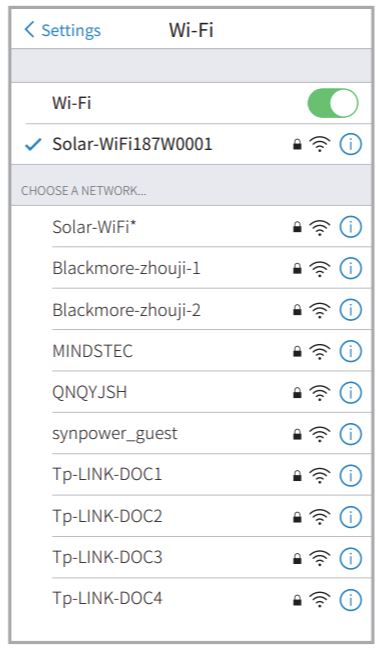
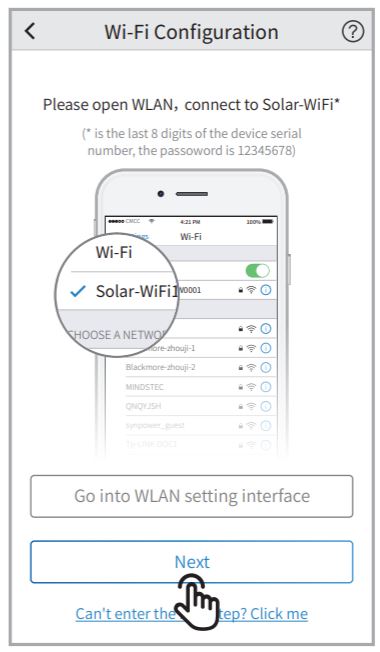
Step 5
Connect your smart device to WiFi to WiFi "Solar-Wifi" or "Solar-Wifi*" with the password 12345678. (* refers to the last eight digits of your inverters serial number.)
Step 6
Click "Next".
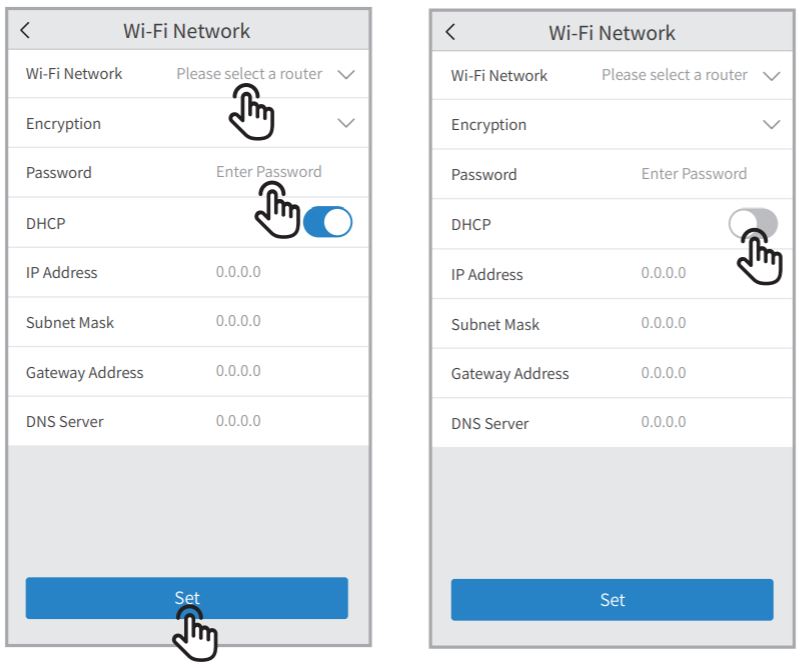
Step 7
Enter WiFi network name and password accordingly, then select "Set". Before doing this, switch off your DHCP and input IP address if you would like to set a specific IP address for your inverter.
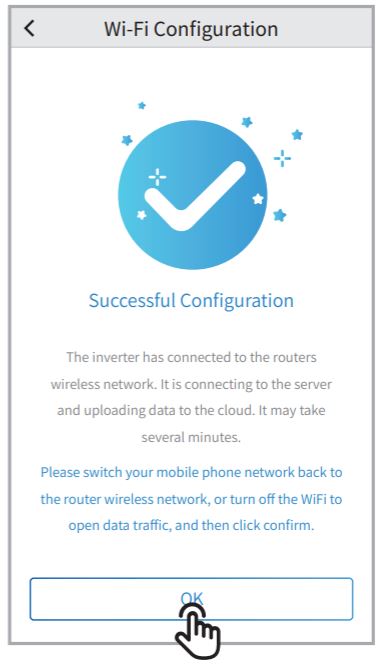
Step 8
Confirm, then select "Ok".
For specific troubleshooting support, refer to Goodwe's website for the latest version of their wifi configuration document.
